Download of Interest :
- iTunes 8.2 Mac/Windows Download here
- RedSn0w Mac/Windows/Linux Download here
- iPhone Firmware 3.0 for iPhone 2G
- bl39.bin 3.9 BootLoader Download
- bl46.bin 4.6 BootLoader Download
Once you have completes all download then read this guide twice or thrice before doing anything. For iPhone 2G there is no baseband update so feel free to play. Before getting started update your iPhone to OS 3.0
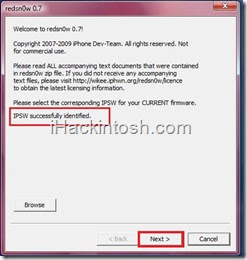
Step One : Create a folder on desktop and name it whatever you wants in the following article we named it iHackintosh. Now put all your downloaded files in the iHackintosh folder. Now connect your iPhone to the computer and launch RedSn0w from iHackintosh folder. In the Window click on the browse button to navigate to the iHackintosh folder on your desktop and select the 3.0 firmware ipsw.
 Step Two : Click theOpen button to continue
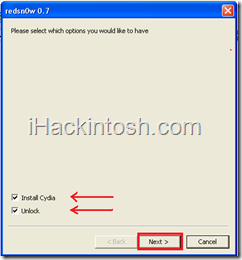
Step Three : In next Window if you need to unlock and jailbreak both then check the both options. if you need to unlock only then check the Unlock box only and if you need to jailbreak only then check the Install Cydia option only. Pick your options and click next button
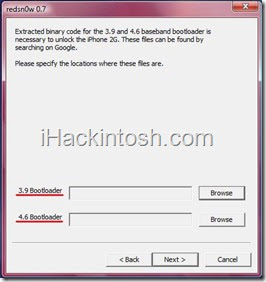
Step Four : If you haven’t selected unlock option then skip to next step. If you have selected to unlock then a window for bootloader files will appear. You will now be asked to select your bootloader files. Click theBrowse button and select the 3.9 bootloader from the iHackintosh folder on your desktop. Likewise do the same thing for the 4.6 bootloader file. Then click the blue arrow button to continue.
 Step Five : Now turn off your iPhone but make sure it is still plugged in to USB port. If you satisfies this term then click next to proceed the next step is to put your iPhone in DFU mode
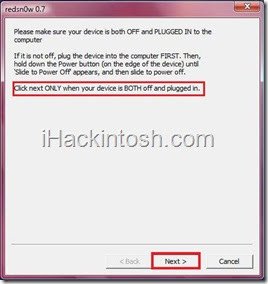
Step Six : To put your iPhone in to DFU mode follow the onscreen instructions as follows Hold the Power button for 3 seconds, Hold the Home and Power buttons for 10 seconds, then release the Power button and continuing holding the Home button until your iPhone is in DFU mode
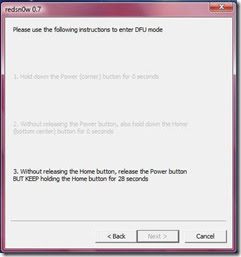
Step Six : If all goes well means you put your iPhone in DFU mode successfully then the following screen will appear otherwise you will be prompted to do from Step Five.
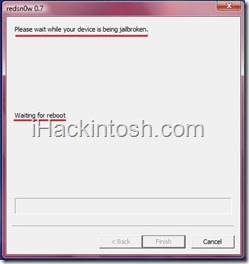
Step Seven : That’s it after 5 to 8 minute of process you will get your hands on a Jailbreaked and unlockediPhone .


0 comments:
Post a Comment